 Chapter 5 – Technical Optimization
Technical optimization can get very complex fast. The average blogger, affiliate marketer, or content creator doesn’t know all that technical stuff about load time, caching, content delivery networks, asset management, and more.
And why should they? That stuff is for web developers.
Well, you are in luck because I am a professional web developer, and I understand all of that stuff. I’ll lay out what to do here, and all you have to do is follow the steps.
Remember that working efficiently and saving time is one of our high-performance goals. Following these steps will give you 80% of the results in 20% of the effort.
Then if you want to learn about technical performance and page experience to take it even further, that’s awesome. But for now, let’s start with some things that will give you the most for your time.
* This tutorial includes some affiliate links. If you click an affiliate link and make a purchase we will receive a commission at no extra cost to you. We personally use and recommend every product and service we link to.
Caching is basically when your web browser or a server stores a copy of a file or set of files, so they can serve them to you faster when the files are requested again.
This helps your webpage to load faster for a visitor who has loaded your web pages before.
In this tutorial, we are using WP Engine hosting, and one reason is that they have caching built right into their hosting environment.
You’re done! WP Engine handles all of the caching on the server side automatically so there is nothing for you to do at this point. You may however need to clear your WP Engine caches sometime.
You do not even need to add a caching plugin, WP Engine wont even allow most of them to be installed because they handle it themselves.
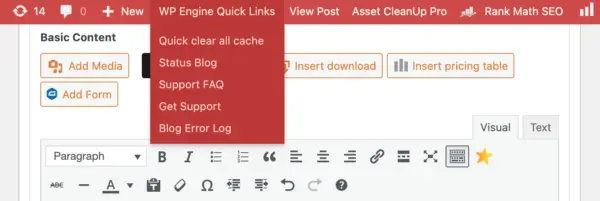
Any time you make updates to your website software or your theme styles, you should clear your caches. When your website is hosted on WP Engine you will see some options in your top admin bar in WordPress.
Click the “Quick clear all caches” button any time you need to clear your caches because you made updates.
* You DO NOT have to clear your caches when you add content in your WordPress admin. You only have to clear them when changes to your website’s theme, plugin, or style settings are changed.
WP Engine also has a page in the admin where you can clear your caches and find a few other resources.
This tutorial uses WP Engine web hosting because it has so many of the things we need for a high-performance website bundled into one. Caching is one of them.
If you are not using WP Engine web hosting, you will need to either use your hosting company’s server caching or maybe a caching plugin.
I recommend WP Super Cache or WP Rocket.
A content delivery network is a network of servers spread out across the world that store a cached copy of your website files so they can be served to you from the closest physical server location as possible.
Yes, how far away website files are from you physically affects how your webpage loads!
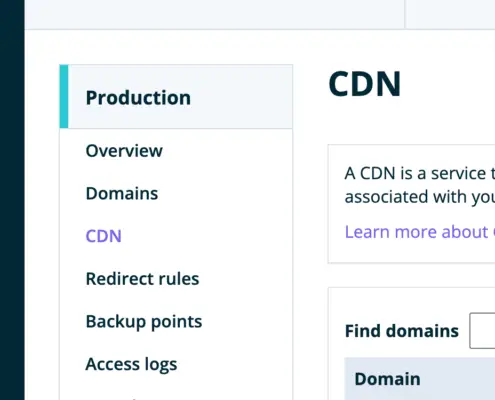 Another awesome time-saving high-performance benefit of WP Engine is that every package comes with a free content delivery network (CDN). Another very easy step to make your website load as fast as possible for visitors all over the world.
WP Engine makes it very easy to add a CDN to your website. Here is a tutorial on how to activate your CDN on WP Engine.
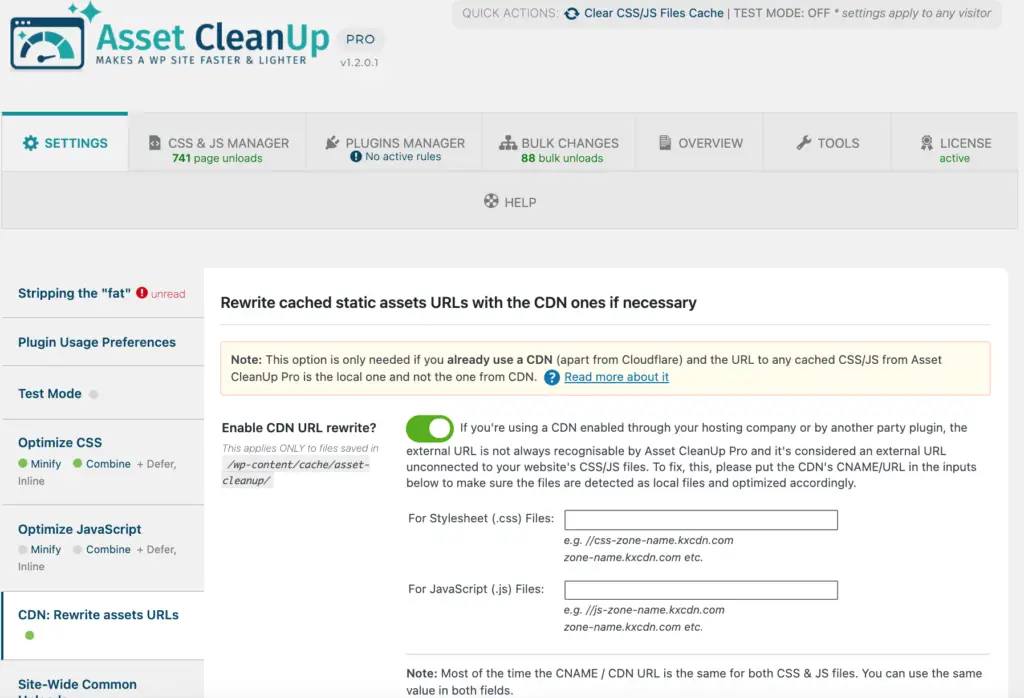
After you activate and verify your CDN on WP Engine, I recommend setting your CDN Base URL in the Asset Cleanup plugin settings to make sure they work smoothly together.
If you haven’t yet heard of the Google Page Experience or Core Web Vitals yet, you will now. Let’s go over everything you need to know. These two things are sets of user-centric metrics that tell Google if your website is providing a high-quality experience for your visitors.
Google Page Experience is a set of user-centric metrics that tells Google if your website is providing a high-quality experience for your visitors. Core Web Vitals are a part of this set of metrics.
For now, there isn’t anything you need to do in this section of our tutorial except learn about the Google Page Experience and Core Web Vitals.
This is an area I wanted you to be aware of now because we are talking about technical performance and something you can come back to later, test your website, and make improvements.
I have gone over these topics in detail recently. Read this article to get caught up.
The Google Page Experience Update, Core Web Vitals, and AmaLinks Pro®

You are investing a lot of hard work into this website up-front, with the goal of it paying off down the road and earning you semi-passive income for years to come. Don’t let your hard work disappear in a flash by ignoring security and redundancy.
Us WP Engine users are at a big advantage without having to lift a finger ourselves. WP Engine has great security on all of its website plans and takes care of the 11 top security concerns for you.
You do not have to do a thing.
I do recommend reading the article about the 11 Top WordPress Security Concerns & How WP Engine Takes Care of Them For You.
If you do not use WP Engine, I recommend reading that article anyways and making sure your server of choice has similar security features. If your hosting does not provide them, you may need to use an outside security plugin like Wordfence.
Sites can get hacked, plugin updates can break your website, data can be lost. It happens on every hosting platform at some point. The internet is always changing and computer hardware physically wears out. It’s a fact of life.
That’s why it is very important to take regular backups of your website.
Here comes WP Engine to help again. All WP Engine plans come with daily automatic backups, with a running 30 days saved, and one-click restore.
That’s awesome and once again thanks to WP Engine, you don’t have to do a thing.
And if someday there is a major problem with your website and you need to revert it, it’s very easy in WP Engine. Here is everything you need to know about backups and restoring on WP Engine.
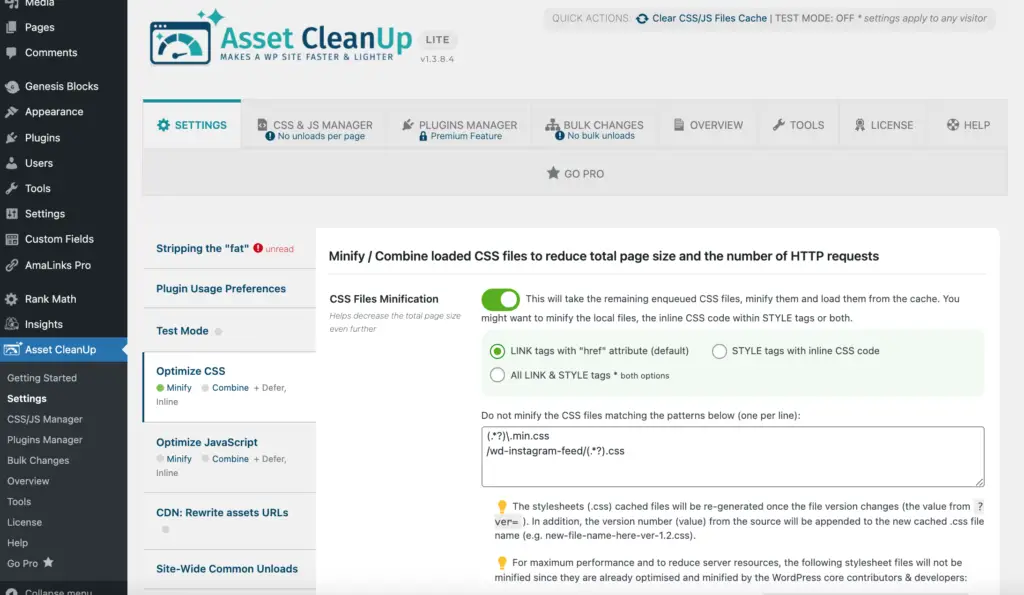
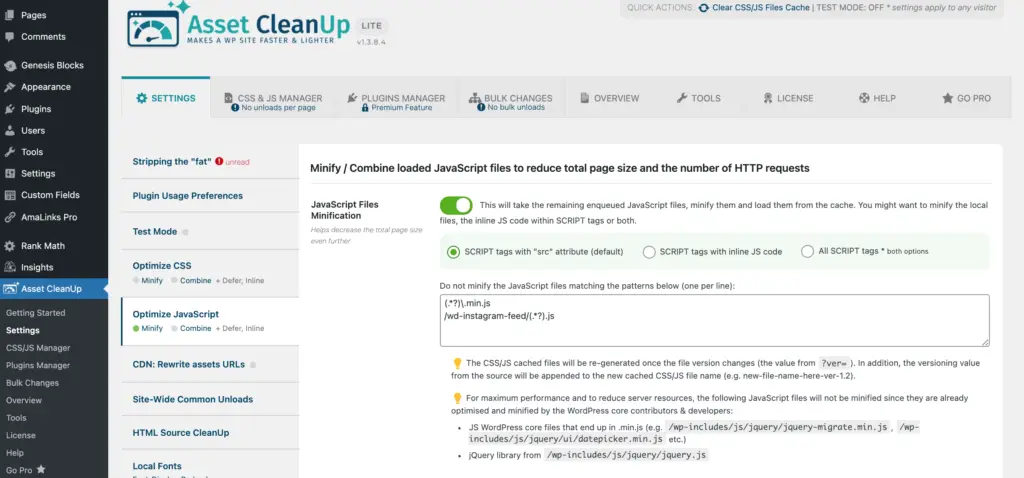
This plugin gives you a thorough toolbox for making sure your pages and posts load fast. Although it can be used to create complex asset loading setups, you will be using it for some easy yet powerful settings.
In your left admin column in your dashboard, click on “Asset Cleanup > Settings”. We are going to set some basic CSS and Javascript optimization settings.
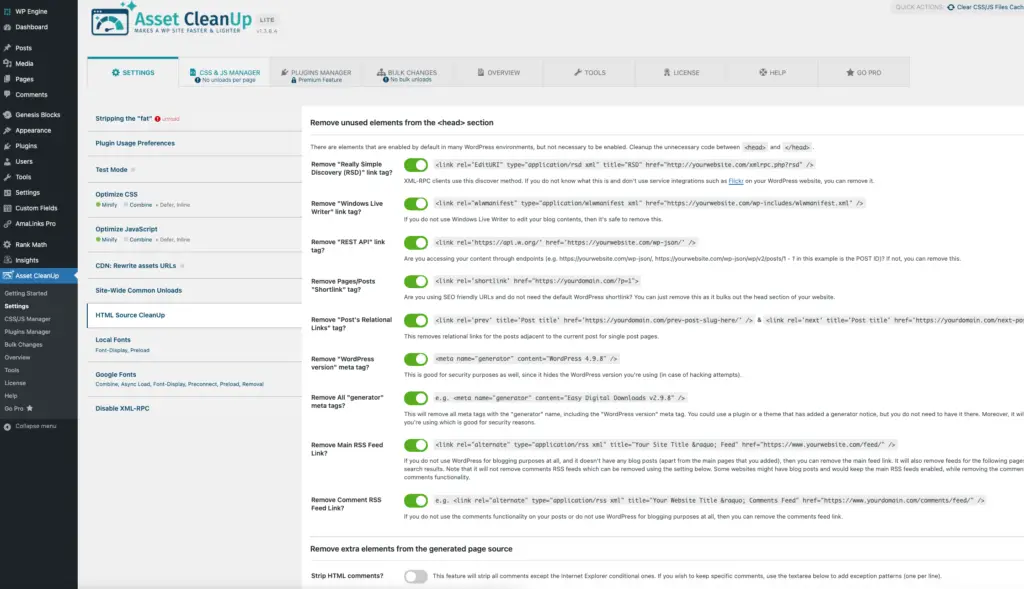
Check all of the boxes except the last one.
Make a copy to save to your own Google Drive and you can check off the boxes as you complete the items. This condensed guide is meant to be used as a complement to this full series on how to build a high-performance Amazon affiliate website.
If you followed this tutorial, you now have a high-performance well-optimized starter website. That’s right, a starter website.
There is a lot more to learn and apply, and when used on top of this high-performance high-quality infrastructure, you can rest assured that you are getting the maximum returns for your investment.
This tutorial walked you through getting your website started off on the right path, and now it’s time for you to take over from here. What should you work on?
Here is a list of some things you can and should spend more time learning and applying.
Remember, I didn’t teach you THE BEST way to build a high-performance Amazon Affiliate website, I taught you A way to build a high-performance Amazon Affiliate website, the Alchemy Coder way – which is as much about high-performance 0n all levels as it is technical.